
Oh my! Who put this damn wallpaper in my house? Don’t fret though, most of the time this dreaded out-dated element can be easily extinguished. Most of the time..
We will be using “simple” tools today. There are a ton of products out there used to facilitate this process. But we only need a couple things one probably already has.
Tools Needed
-
A Garden Sprayer Chapin 1 Gallon Multipurpose Garden Sprayer at Amazon
-
Large Sponge Rubi Hydro Plus Pro Sponge at Amazon
-
5- 6″ Drywall knife Amazon Basics 6″ One-Piece Stainless Steel Knife at Amazon
-
Ladder Height Depending on Wall
-
Sander on an Extension Hyde Radial Sander or Warner Plastic Pole Sander Head at Amazon
-
Canned Spray Paint Zinsser Bulls Eye 1-2-3 Plus Primer Spray at Amazon
-
Drywall Pan Amazon Basics Stainless Steel Mud Pan 12″ Long at Amazon
-
Drywall Mud Easy Sand 5 Minute Drywall Mud at Amazon
Step 1
Fill the garden sprayer with warm to hot water, and pump that bad boy up. Now we start at our highest points spraying enough to take our sponge and “smush” around the water in the seams of the wallpaper.
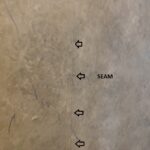

Once we have our seams wet we can begin the outer peeling process.
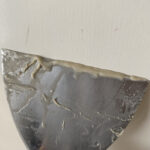
Step 2
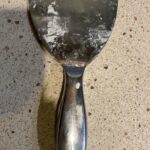
Now we take our drywall knife and cut down at an angle to pry up an edge on the seam. If your knife is bent a little, make sure the bent part doesn’t gouge the wall.
My knife I use is from believe it or not Amazon. It is actually quite durable.
Why only use a smaller knife? A bigger knife such as a 12 inch or 10 may catch irregularities in the drywall finish and cause unnecessary damage to surface.
Once we have enough edge to get a good grip on, grab and pull. Pulling at a steady force and down, trying not to rip it.
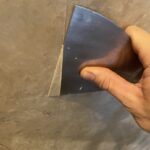
Once we have at least 2 sheets of the outer wallpaper removed, we can start the next step.
Step 3
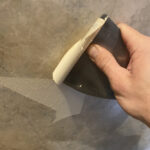
Now that we have this outer layer gone, we can get messy. Taking the garden sprayer again now we soak the entire fuzzy under layer. This is where we take out sponge again and help spread the water around evenly.
While this is sitting and softening, we can move on to the removing of the next outer layer.
I like keeping a step ahead with peeling the outer layer to provide extra wetting and softening of the material we are trying to remove.
After that, spray and sponge down the first underlayment area again.
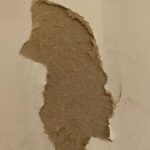
Step 4
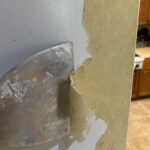
After letting sit for at least a minute again, but not till dry. It is time to scrape the under layer off to bare wall. It should scrape fairly easily as long as the wallpaper installer hung over properly primed drywall or plaster.
Re-wetting maybe necessary, it will not scrape easily if not wet.
Care should be exercised when scraping to avoid gouging of drywall or plaster. I always scrape at a very low angle, and outward towards outside corners.
Depending on the quality of the finish standard of the drywall or if they used sizing primer underneath will usually dictate the amount of gouging.
Step 5
Now we must use our wet sponge and knife to remove any extra glue residue. This stuff may not be visible, but will really mess up your finish coat of paint.
Its real slimy and nasty to, I hate this part.
Step 6
After repeating steps 1-5 continiously until done, at this point where the start point is should be dry enough to sand.
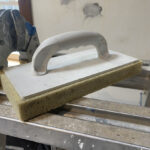
A power sander, such as a “Festool” would be ideal. Considering this option is expensive for one to use, A Hyde Circle or Pole Sander as mentioned in tools needed will suffice.
I prefer the circular sander head for the reason of its anti flipping characteristics.
I would use at least a grit of 120 to sand the entire wall. Running your hand over the wall, you will feel tiny bits of debris. When done sanding the wall should be very smooth.
Step 7
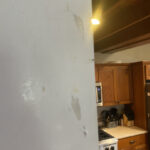
Sometimes whens scraping the drywall can become peeled and somewhat heavily damaged. Putting drywall mud over these spots directly will just cause a blistered look.
Using our canned spray paint, simply spray these spots somewhat heavy and rub it in with you fingers.
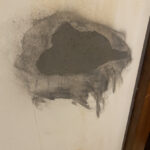
All we are trying to do is seal off the damaged part.
Oil based “Kilz” or “Bin” Primer can perform the same task, but this using spray paint is cheaper and much more convenient.
Step 8
Once these damaged spots have dried up, drywall mud can be applied. I always hit these spots twice with mud.
They should not show blistering.
To speed up the drying process a chemical set mud can be used, such as “Easy sand 5” by Sheetrock Brands.
I usually put a good fan on these spots to really accelerate the process.
Once dry, sand the spots and paint your walls. Simple. No fancy chemicals, just patience and time. Like everything.